Showing posts with label DIY. Show all posts

Wednesday, May 14, 2014

I felt like a genius today

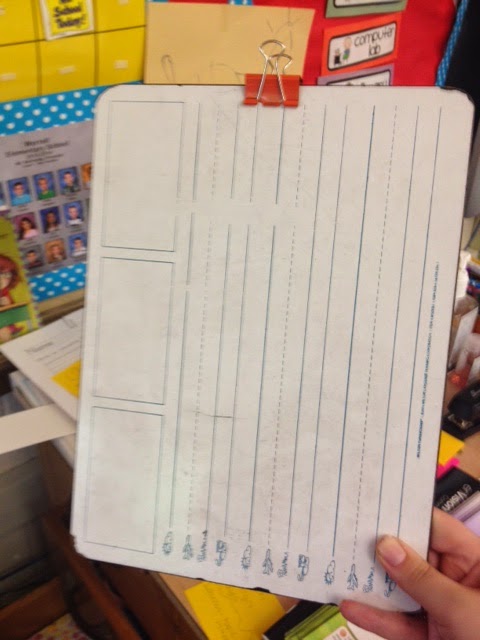
Dilemma: I've run out of clipboards during a math activity.

Solution: Whiteboards + Binder clips 


Wednesday, October 9, 2013

Make A Book Center


Most students I encounter love making their own books and stories. This Make A Book Center makes book making easily accessible. This can be a nice alternative to independent reading during the day.


Here is a close up of what this first grade teacher added to her center.

Monday, September 9, 2013

Make It Monday

I have been in my apartment for a little over two months now. Everything is in it's place but my walls were looking very bare! I traveled to Target scope out some shelves. Shelves are pretty pricey. I knew I could cheat the system and find something more in my budget.

I went to my local thrift store and began the hunt.

I found three shadow box shelves for $3 each. And a one crown molding shelf for $3. That's a total of $12 for shelving!


I couldn't resist changing the color of them. I bought two bottles of grey acrylic paint and began coating them with a cheap sponge brush. You can find the paint and brushes at your local A.C Moore, Michael's and sometimes Walmart. The bottles of paint were less than a dollar each and the brushes are like 50 cents and you can find them in a variety of brush sizes.

Each shelf needed 2-3 coats until I was happy. The paint really doesn't take that long to dry. Don't sit and watch paint dry. Find something else to do in between coats.

I let the last coat dry overnight and began hanging them the next morning.

I first decided where I would place each shelf. I matched up the holes on the back of the shelves with washi tape and then I put the washi tape on the wall where I wanted the shelves. That helped me know where to put the nails on the wall.


It sounds so simple and painless because it was!


Wednesday, July 3, 2013

Moving Day Recap!


The boxes have been moved, mirrors have been hung, and the aches and pains in my legs are finally gone. We've moved into our apartment. It went so smoothly. A lot of it had to do with the tips I posted here. Preparing for a move and actually moving are two separate things. Here are some things that helped me on moving day that wasn't in the previous "moving tips" post

1. If your friends are helping have them come in shifts. This may work out without you having to really schedule anything due to people having lives and all. I had a lot of help in the morning with getting boxes up to the third floor (no elevator here ladies and gentlemen!). I had three friends plus me to do this. With their help and three cars, we had all boxes in the apartment by noon (we started bringing boxes in around 9:45-10ish, not bad eh?!). We rented a UHaul and Dave (boyfriend) and his brother filled it with all the furniture and were responsible for bringing Uhaul contents up to the apartment. The reason why I didn't just have all boxes and furniture in the Uhaul together was that I thought it would become a bottle neck and slow the process down. I could just imagine everyone grabbing things from the Uhaul while furniture was trying to be brought it. It seemed crazy to me. Most of the boxes were moved into the new place while the furniture was being loaded into the truck from our old place and a storage unit I had holding a lot of my furniture. By the time we were done with the boxes, the Uhaul was at the apartment ready to unload. We never really crossed paths and weren't in each other's way.
      My mom came half way through the move, she was especially helpful in placing the furniture in places that made sense. Having someone come in with fresh eyes and who isn't exhausted from moving for four hours already will help keep moral up. She was probably an HGTV star in a previous life so she came in and sprinkled her magic design dust.

That's her doing her "leveling" work
2. FEED THEM

Find a pizza place and order pizzas for everyone. I made sure to buy a case of waters too. The last thing you need is a dehydrated friend passing out on you. We ended up with too much pizza but I would have rather that scenario than people being left hungry and being put to work. We were able to give Dave's dad an entire pizza to take home with him. Consider buying some gift cards ahead of time to hand out to people you have asked to help as an added thank you. Another idea would be to pay for their meal the next time you are out with them.

3. Do some prep work at the apartment the night before, if you can.

We signed our lease on a Friday after work and prepped to move Saturday morning. After we signed the lease, I filled the apartment with some necessities. Toilet paper, paper towels, trash bags, paper plates, advil, band-aids. I also brought in bags that I had prepped the week of. 
-  a bathroom cleaning supply bag (don't forget the plunger) with a shower curtain and liner
-  a kitchen cleaning supply bag
-  a bag of command hooks, scissors, extension cords, surge protectors, box cutter

This helped save me an errand in the morning knowing all of this stuff was already in the apartment and placed in appropriate spots. 

4. Stay calm. 

Don't stress especially if you have friends helping you. At the end of the day, you want them to still be your friends. Things may not go the way you planned and their may be kinks but just keep your eyes on the final result.


Light bulb problems...not the worst thing in the world.


Sunday, June 16, 2013

DIY Furniture Revamp!

My boyfriend and I will be moving into an apartment in two weeks. I have been garage sale and thrift store hunting for some great deals to fill our new space. This time of year is a great time to hit up some garage sales. The weather is great and people are eager to clean out their homes. I found a lot of yard sales using YardSaleSearch.com. When you are hunting, do not let the color or appearance of an item turn you away. It is so simple to change the look of any item.

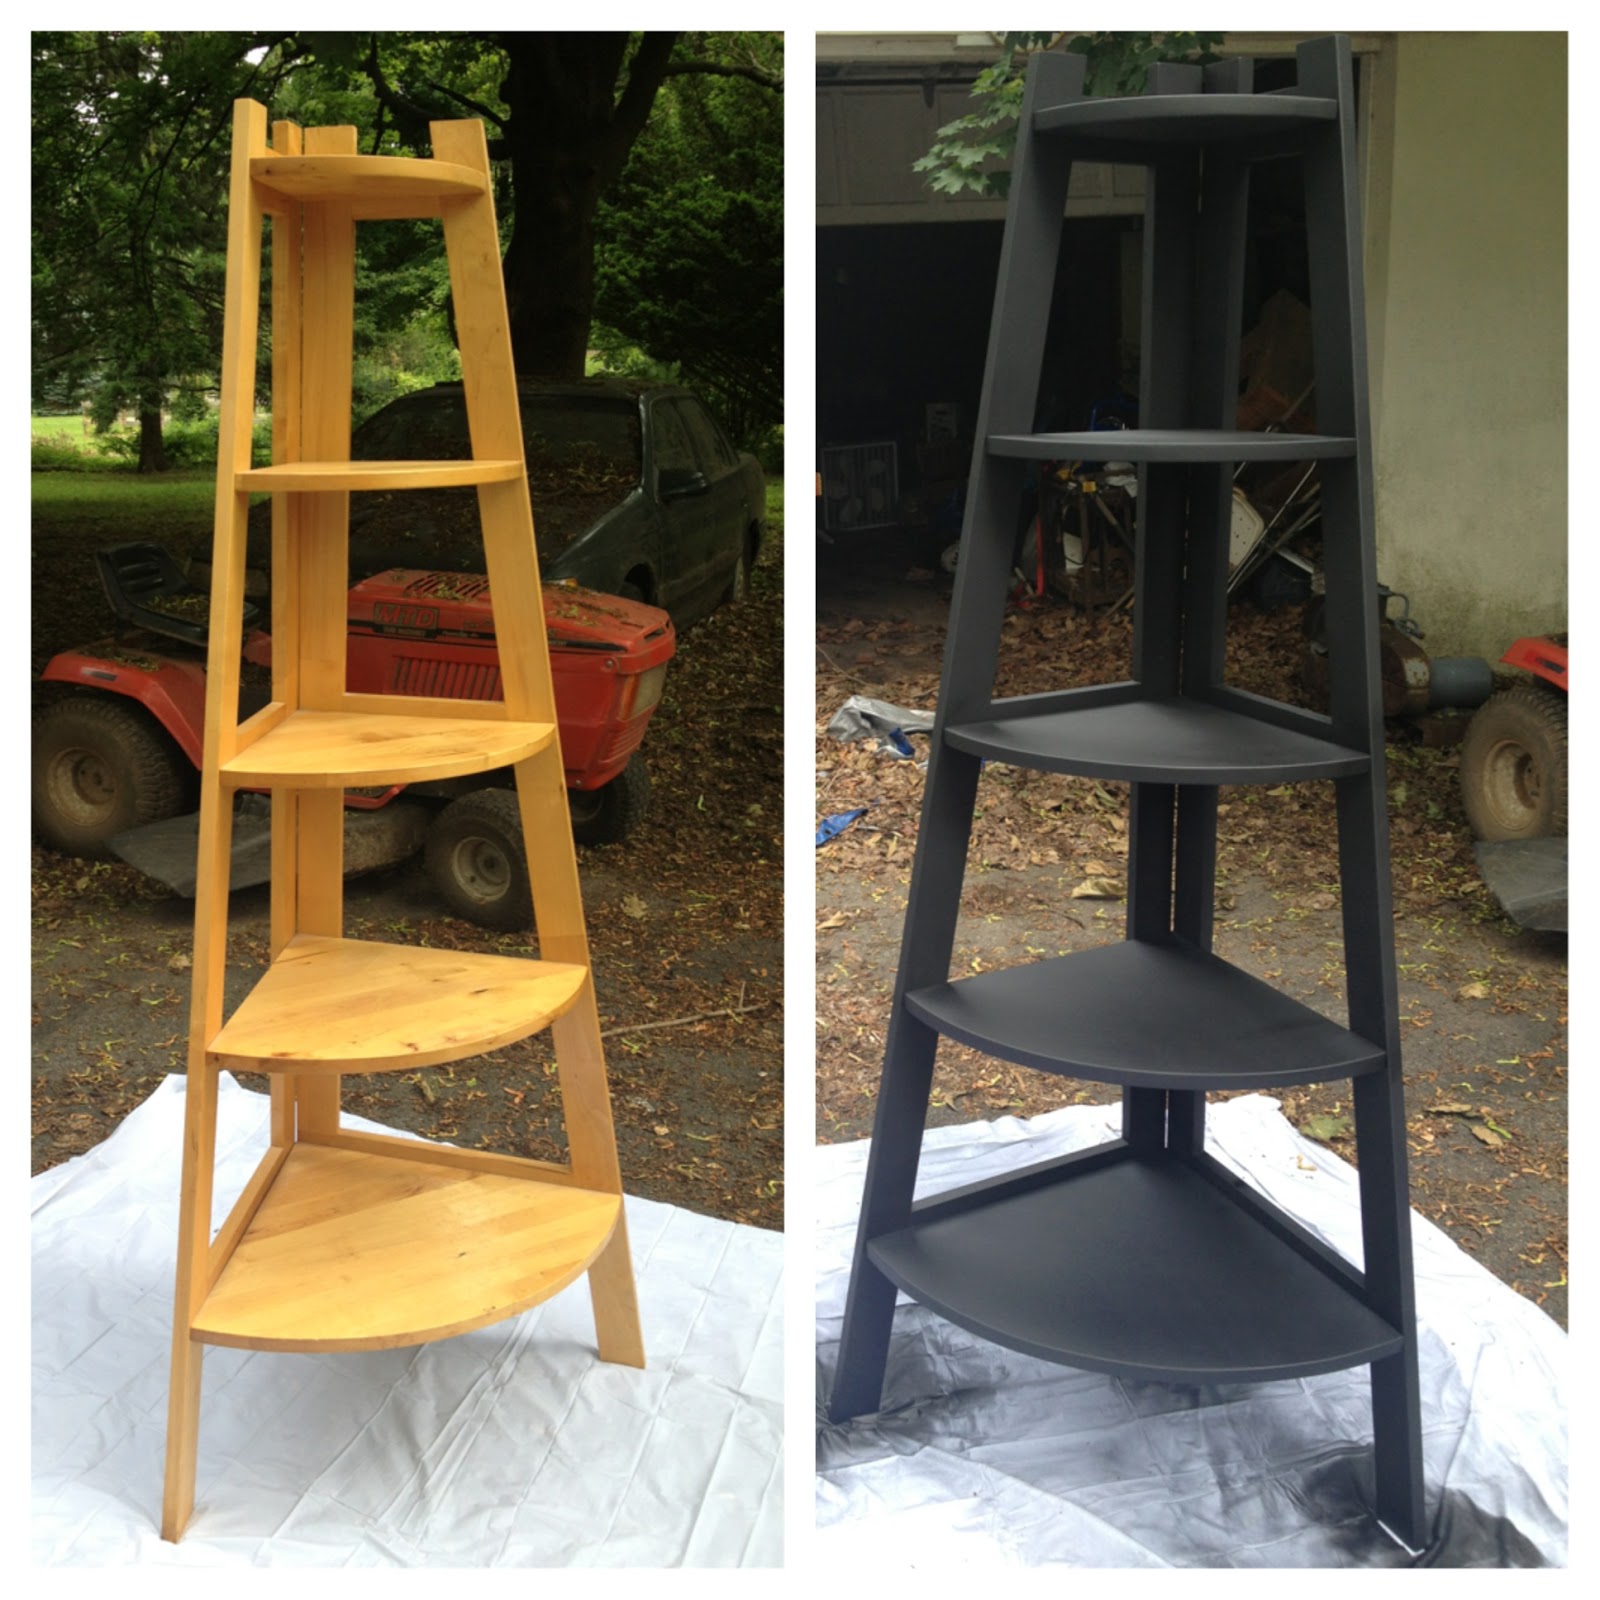
I bought this corner shelf unit for $15 at a multi-family garage sale. I simply sprayed on some spray paint and I have a the shelf I want. I get my spray paint at Wal-Mart for about $3.50 a can.

I also sprayed a lazy susan and a knife block a pretty blue for a pop of color in the new kitchen.

I made sure to cover the parts I didn't want exposed to the spray paint with blue painter's tape.


I also found a great place to find home goods, the Habitat for Humanity ReStore (find a location here) You can get sofas, hardware, kitchen cabinets, refrigerators and more!

I was able to get this bookcase for $5! And all of your money goes to benefit Habitat for Humanity!


I will be using this to hold shoes for our new entry way. I will be on a hunt for some cute bins to place on the shelves to work as a drawers.


When you are moving into your first place, there is no need to break the bank, even if you are starting from scratch. Hit up yard sales, thrift stores, Goodwills, and Restores FIRST. Do what you can to make your hard earned money go far!


Wednesday, May 29, 2013

DIY: Wall Art

This past weekend was DIY time. I helped my friend, Rachael enhance the wall behind her bed. See her room come together here.

We started day 1 with shopping. We bought most of the frames at our local Goodwill. All the frames came under $20!!!


If you attempt this project remember to check the back of your frames! You may need to add some brackets in order to hang them.

We bought fun letters, words, and shapes to add to this wall "collage" from Michael's. We then placed everything on her bed to play with the arrangement and decide what frames should be painted what.

Then we added the next layer, the scrapbook paper.

Don't forget to grab something to eat.


Remember, you can always bedazzle!

Before

 After
 
Having a cutting mat and an exacto knife will make cutting your paper a lot more precise and quick.
 
 
Tips and Resources:
** Choosing the right glues can make or break a project. There is nothing worse than gluing something, waiting for it to dry, and it falls right off!


Frame Hanging Trick! <<Wish I saw this earlier!


Tuesday, May 28, 2013

DIY Tile Coasters


This DIY project is easy and cheap. The beauty of this project is that is doesn't look easy OR cheap!

First, you will want to gather your  materials.
  •  Mod Podge
  • - Paint brush
  • - Tiles
    • I got my tiles at Lowes for 18 cents EACH!
  • Scrapbook paper
    • This is where you can really personalize your coasters. You can coordinate your scapbook paper selections with the decor of the room you are putting them in, favorite colors, sport's teams, and on and on and on.
  • Exacto knife or scissors
  •  Felt Floor Protectors
    • These will go on the underside of the tiles to prevent scratching. I bought mine at Target's dollar spot. They have adhesive on the bottom like a sticker. 


.


Start Crafting!

1. Cut scrapbook paper to fit your tiles. 


 2. Paint a coat of mod podge on the tile and place paper over tile. Let dry (3-5 minutes, it doesn't take long)

3. Paint a few coats over the scrapbook paper to create a seal. Make sure to paint the sides of the tile too so the paper doesn't warp and peel off. 

4. Place floor protectors on bottoms of tiles.


Presto! You have beautiful expensive looking coasters!


Monday, May 27, 2013

The Nanny Series: Part 3: Personal Nanny Bag

Thanks for joining me for part 3 of The Nanny Series. Today's post is about YOU. You will want to make yourself a bag of belongings to keep at your employers house.

This isn't the best picture so I will list off what I have in my bag and why.


  • Sweatpants and sweatshirt
    • Yes, the summer is hot but sometimes with the a/c running in a home it can get too cold. When I am working in the summer I am usually in spandex work out capris and a tank top. When I am indoors it can get chilly. I can throw my sweatpants over my leggings and be comfortable.
  • Change of clothes
    • You never know when you will get rained on, painted on, puked on, or completely sweat through your clothes. (All four have happened to me) A nanny's day is long so you want to feel clean and dry. 
  • First-aid items
    • band-aids, Advil, Pepto tablets, Tums. You want to be comfortable all day and you never know if your employer will be out of something you need. Make sure you have the back ups. 
  • Lady products
    • You could run out of tampons/pads from your regular supply in your purse at any time. You DO NOT want to be stuck in this situation. 
  • Hair Products
    • I pack with me bobby pins, headbands, and hair ties. Like I've said before, the summer is HOT. You may need to pull your hair back. You may even break a hair tie so you will want these extras with you. 
  • Make up supplies
    • You may sweat off your make up and want to reapply. That doesn't make you vain! You may get caught in a water gun fight and now have mascara running down your face. Keep make up remover wipes and some touch up make up with you. 
Keep all of these items in a fun bag that you will keep at your employer's house and in a safe place. This is not the same as your every day purse you will have with you. These are all back up emergency items to help keep your day running smoothly.


Sunday, May 26, 2013

The Nanny Series: Part 2: Car Kit

Welcome back to The Nanny Series. Part 1 was about creating a nanny headquarters binder. Part 2 will be about keeping organized in the car. What you will need will vary a lot on the age of your child(ren). My children are going to be 11 and 6. They are independent but may still make messes and get some cuts and bruises. Having a car kit will help ease the stress of crazy times!

A staple in any car kit would be sunscreen, trash bags, and an umbrella.

I bought a few pencil pouches from the dollar store. Inside the pouch I have Neosporin and bandaids, hand sanitizer, lotion, and Advil. A travel kit of wipes should be in everyone's car kit. They help clean up messes and messy kids!

Find yourself an extra bag you have in the house and you are all set! If your kids are old enough, let them know where to find the bag in case you are driving when an incident occurs when you will need your car kit.

Other items you may want to add:
- toys/activities for longer car rides
- snacks
- books
- tissues
- Quarters for unexpected meter parking


Saturday, May 25, 2013

The Nanny Series: Part 1: Nanny Binder

If you will be nannying or working with kids this summer you may want to pay attention. I will be posting a series to help prep you for your summer nanny job. Today's post will be on creating a nanny binder.

I was a nanny last summer for a toddler and I will be a nanny again this summer for two girls ages 6 and 11. They will have full summer schedules with camps and activities so having a binder will be the best way to keep me organized.

First, I created my own cover page. Of course, it needed to be ADORABLE and appealing to the eye. I am going to have to look at this all summer long! You can download your own free nanny headquarters binder cover sheet here.

My employer asked me to keep track of my hours every week. The easiest way for me to do that is to create time sheets and print them out for every week of the summer.

You can download free summer time sheet here.

Binder Sections:

* Calendar. You can find a super cute free summer calendar here. This will help keep you organized and let you plan ahead.

* Summer Ideas. I see things on pinterest or run across ads all the time with things I want to do with the kids. This is the section to keep those ideas!

* Notes from Nanny. I do not have this in my binder for this summer but when I was with my toddler last summer I needed something to help me keep track of what my child ate, when she napped, and what we did throughout the day. I promise you, your days will start to blend together and it is nice when the parents come home for you to have something written out stating what you did with your day. I don't think I will use this for my job this summer because my kids are older and can tell their parents about their day. I plan to have the girls create a summer memories journal where they can write what we did each day or each week.

You can download your free notes from nanny sheet here.

* Medical. This will include photocopies or health cards, name of doctors, health professionals, and hospitals in the area. I created an editable family information sheet that you can download for free here.

I will make sure this binder goes with me everywhere. You never know when an emergency will happen. I want to make sure I have all the information I need. It will have a special place in the house where the children know where to find it as well.

Staying organized is the key to a successful summer and it will impress the parents you work for. It shows that you take your job seriously.

Part 2 of The Nanny Series will be about creating a Car Kit for you and your little ones.

Stay Tuned!


Friday, May 3, 2013

DIY: Classroom Response System


This great idea came from a 3rd grade classroom I subbed in. Every chair in the room had a hook and a set of affordable response systems.

I love the hook on the back of the chair idea. There is less of a chance the cards will get mangled and lost.

Polling Card Options:


This system could be used successfully in any grade level in any subject. You could add more cards to it for writing, "brainstorming","rough draft", "editing", "final draft". The possibilities will go as far as you take them.


Wednesday, April 24, 2013

A Glimpse in a Kindergarten Classroom

After being in many different classrooms this year, I have noticed that some of the most organized classrooms are those of kindergarten teachers. This is probably because they usually have an AM class and a PM class. Being organized is especially crucial. They have two sets of many things. Kindergarten classrooms also tend to have more STUFF....dramatic play centers, science centers, blocks, listening centers, math manipulatives, and pocket charts, pocket charts, and more pocket charts.

I had the privileged of being in a kindergarten teacher's class that had organization, function, and classroom design DOWN. I could see that most of the items in her classroom were purchased at a local Lakeshore Learning store (www.lakeshorelearning.com). I have real life classroom pictures plus links to the products. 

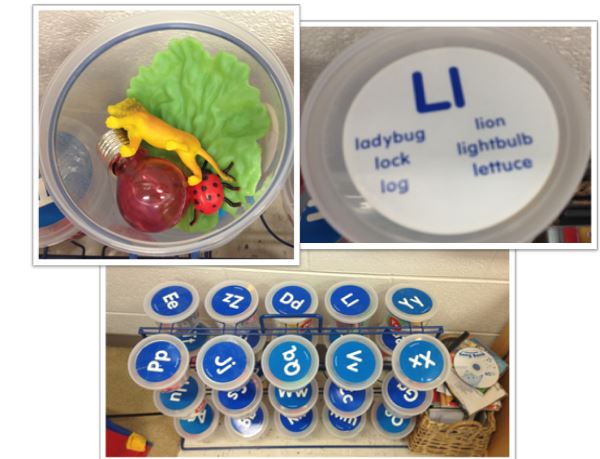
 Alphabet Sounds Teaching Tubs


Find this product here
I think a DIY alternative is definitely possible. It will take a lot of time but probably won't cost you $150. The storage rack is $29.99

Creating Centers


On the side of the filing cabinet are the list of different centers students can participate in. On each side are little magnet people (AM class on one side and PM on the other). Each magnet person has a students name on it. You can easily group your students and your students can easily see what group they belong in and where they need to be. You can simply rotate the centers by moving the yellow center magnets and then tell your students to move to the center next to their name. 

The paper trays in the picture house some of the different centers that involve coloring, writing, reading, and well..paper. These can be found here on Lakeshore's website. A set of 4 is $19.99

Write & Wipe Kid Magnets can be found here.
30 pieces for $19.99

The magnetic center chart is also another project that can be turned into a DIY. 


 Magnetic Place Value Blocks

How long have these existed without my knowledge?!! I don't know how many times I have come into a class having to teach place value. I end up holding and DROPPING the little cubes and fumbling through the lesson. Just add magnets to the back and BOOM, easy! It will make any lesson more effective when your students can actually see what you are talking about. 

Magnetic Place Value Blocks can be found here
121 pieces for $44.99

Teacher on a budget version: Add magnets to your blocks. :)


Organize Your Materials By Day

I mentioned a similar concept in a previous post. Organizing your materials by day will help keep you the classroom teacher organized from day to day but it will also help your sub. 


Similar bins can be found here
6 for $39.99

There are so many great teaching resources out there. When on a budget try to balance what is worth buying to enhance your classroom and what you can make on your own. 


Sunday, April 7, 2013

Recipes Now on the Regular


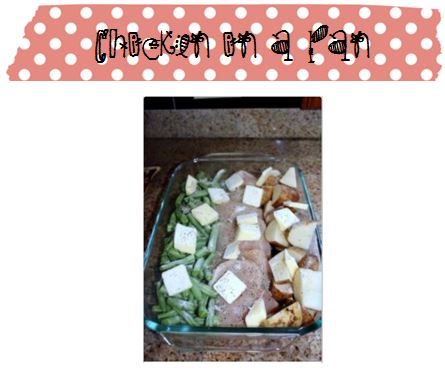
Just thought I'd share some recipes I've found on pinterest that will now be on regular rotation in my kitchen.


{Mix your ranch seasoning in Chobani yogurt}
 
{Green beans, chicken breast, potatoes, butter, Italian seasoning. Bake 350 degrees for an hour.}